Add Row
Add Element
cropper
update
VIRGINA REAL ESTATE NEWS | VA HOME BUZZ
update
Add Element
  • Home
  • Categories
    • DIY
    • REAL ESTATE
    • HOME DESIGN
    • RECIPES
    • Home Improvement
    • Maintenance & Repairs
    • Extra News
    • Remodel On A Budget
Add Row
Add Element
July 08.2025
2 Minutes Read

Revolutionize Your Summer Cooking with This Mess-Free Corn Shucking Trick

Mess-free corn shucking with hands over a plate.

Unlocking the Secret to Hassle-Free Corn Shucking

If you love the taste of sweet corn in the summer but dread the mess that comes with shucking it, there's good news. There's a clever little trick that ensures you can enjoy delicious corn on the cob without the hassle of messy silks.

Microwave Magic: The Game-Changer for Home Cooks

According to the talented cookbook author Julia Turshen, the secret lies in your microwave. Yes, you can shuck corn with just the heat and steam from this kitchen appliance! To get started, simply place your desired number of corn ears—husk and silk included—inside the microwave. For best results, three ears should be microwaved for about six minutes. If you’re a fan of slightly different methods, some have reported success using only two to three minutes!

A Step-by-Step Guide to Effortless Shucking

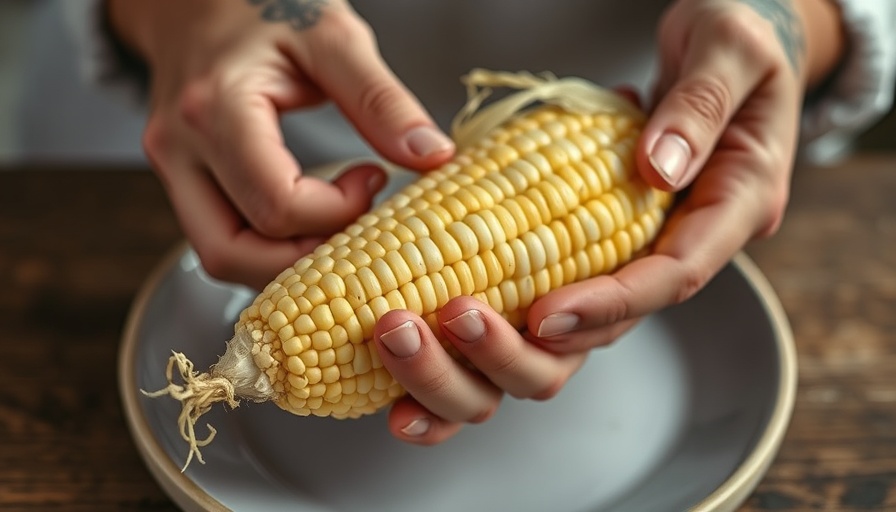
Once the time is up, be cautious of the heat. Grab a towel to protect your hands and slice off the stem end of the hot cob. Here comes the fun part: grasp the silk end and push up. You'll be amazed as the corn slides right out of the husk, leaving all those sticky silks behind. This method not only simplifies the shucking process but also results in perfectly steamed corn, ensuring a juicy and sweet flavor.

Why This Trick Is a Must-Try This Summer

This hack is gaining traction among home cooks as it transforms the shucking experience into something enjoyable rather than a chore. Instead of dealing with errant tassels all over your kitchen, you can keep it clean while ensuring that your corn comes out ready for grilling, boiling, or sautéing on the stovetop.

So, next time you're preparing a meal that features the quintessential summer treat, try out this microwave method! Not only will you save time and effort, but it creates a fun family activity to share in the cooking process.

Now that you know this fantastic technique, don’t forget to slather on some butter, sprinkle salt, and maybe even add cotija cheese for that extra touch of flavor.

RECIPES

0 Comments

Write A Comment

*
*
Related Posts All Posts
07.09.2025

Aldi's Ambiano Rice Cooker: A Must-Have for Home Cooking Enthusiasts

Update Aldi's Ambiano 2-Cup Rice Cooker: An Essential Kitchen Companion If you're a fan of home cooking, you'll want to know about Aldi's Ambiano 2-Cup Rice Cooker, available for just $14.99. This compact appliance has made cooking rice a breeze for busy families, and once you try it, you'll understand why it's become a kitchen staple. Low Effort, High Reward Cooking Picture this: you come home after a hectic day and the last thing you want to do is slave over the stovetop. This is where the Ambiano Rice Cooker shines. Simply add your washed rice and water (and maybe a pinch of salt or a bit of butter for extra flavor), press the button, and walk away. No stirring, no watching, and no worry about burned rice. It frees you up to attend to other dinner duties, making it perfect for home cooks who juggle various tasks. The Versatile Cooking Power What makes this rice cooker more than just a rice cooker is its versatility. While it's fantastic for preparing fluffy rice, you can also use it for cooking lentils, quinoa, or even oatmeal—all with minimal effort. Imagine whipping up a healthy lentil side dish or a comforting bowl of oatmeal for breakfast, all without the usual fuss. Value Beyond Price At just $14.99, it's a small investment that pays off in so many ways. Owners report using it four to five times a week, whether to create bases for stir-fries, transform leftover chicken into hearty fajita bowls, or as a warm side for virtually any meal. The non-stick ceramic coating makes cleanup quick—just toss the pot in the dishwasher! Plus, the sleek design means it won’t clash with your kitchen aesthetics. Why Now Is the Time to Buy This rice cooker is not just about functionality; it’s also stylish. With the Ambiano’s polished appearance, it wouldn’t look out of place in any magazine-worthy kitchen. As it comes back in stock, you have a chance to elevate your cooking game. If you rely on your kitchen appliances like I do, this is an opportunity you shouldn't miss. It’s perfect for new cooks and seasoned chefs alike, and you'd be amazed at the culinary creativity it sparks! Don't let the chance to make your kitchen life easier slip away! Head to your nearest Aldi and pick up this fantastic cooker. It’s sure to unlock a world of fun recipes and save you time, allowing you to focus more on enjoying cooking and less on preparing.

07.09.2025

Elevate Your Home Cooking: The Easiest Grilled Broccolini Recipe

Update Discover the Joy of Grilling Broccolini As summer rolls in, many of us find ourselves fired up about grilling. While burgers and steaks often steal the spotlight, one underrated gem is making its way to the grill: broccolini. This tender green, a hybrid of broccoli and gai lan, brings a fresh flavor that can elevate your grilling game with minimal effort. Why Choose Broccolini for Your Grill? Broccolini stands out among other grilled vegetables because it requires virtually no prep time. Unlike zucchini or corn, which often demand slicing or husking, broccolini can be tossed directly onto the grill. Its slender stalks and delicate florets not only add visual appeal but also create a delicious contrast in texture. The florets help keep the stems from slipping through the grates while providing a delightful char in just under six minutes. Simple Steps for Perfect Grilled Broccolini The beauty of this recipe lies in its simplicity. All you need is one pound of broccolini, a drizzle of olive oil, and a sprinkle of kosher salt. The grilling process is straightforward: Preheat the grill to medium-high. Toss the broccolini in olive oil and salt. Grill for 3 minutes, flip it over, and grill for another 3 minutes until slightly charred and tender. For a zesty finish, throw a lemon on the grill while the broccolini cooks. Squeeze the grilled lemon over the top before serving to enhance the dish’s natural sweetness. Pairing Suggestions Grilled broccolini makes for a versatile side dish. Pair it with grilled meats like salmon or pork skewers for a well-rounded meal that showcases the best of summer grilling. Conclusion and Call to Action With just a simple recipe and a few ingredients, broccolini can transform your dinners into exciting culinary experiences. So, fire up those grills! Explore additional easy recipes and make the most of summer cooking in your home.

07.09.2025

Unlock the Secret to Better Pesto: Just Add Lemon!

Update Is Your Pesto Missing Something? Add a Zing with Lemon! Pesto lovers everywhere can elevate their go-to sauce with a simple yet transformative ingredient: lemon. This unexpected twist works wonders whether you're whipping up a homemade batch or enhancing store-bought varieties. The addition of lemon adds brightness, balancing the richness of basil and nuts often found in traditional recipes. Why Lemon Makes a Difference in Your Pesto When creating pesto, the flavors need to be well-balanced for the best experience. Adding fresh lemon juice or zest doesn’t just inject a zesty kick; it also enhances your pesto's flavor profile, making it seem saltier and more enticing. This was discovered when tweaking recipes for pesto alla Trapanese, a variant that combines the flavors of toasted nuts and fresh tomatoes—sometimes, a splash of lemon is all it takes to elevate your classic pestos. How to Perfectly Infuse Lemon into Your Pesto The technique is simple: if you’re using lemon zest, aim for about a teaspoon per quarter cup of pesto. For lemon juice, start with one tablespoon of freshly squeezed juice per cup of pesto. This adds a fabulous acidity that will brighten all flavors. Adjust based on taste, especially if your pesto already leans towards salty. Practical Tips for Lemon-Loving Foodies A few tips for incorporating lemon into your pesto: always use fresh lemons for the best flavor, and make sure to roll the lemon on the counter before juicing—it releases more juice! Many food enthusiasts already embrace this tasty addition, but if you haven’t tried it yet, you're missing out on a delightful flavor upgrade. Explore New Flavor Frontiers in Your Cooking In the world of home cooking, experimenting is key. Using lemon in your pesto can lead you to discover other places where this acidic gem can shine. Picture dolloping lemon-infused pesto on grilled chicken, using it as a vibrant salad dressing, or enhancing your favorite pizza with zest. The culinary possibilities are as vast as your imagination allows!

Add Row
Add Element
UPDATE
Add Element

COMPANY

  • Privacy Policy
  • Terms of Use
  • Advertise
  • Contact Us
  • Menu 5
  • Menu 6
Add Element

18047045373

AVAILABLE FROM 8AM - 5PM

City, State

, ,

Add Element

ABOUT US

Discover Virginia homes, DIY home projects, interior design ideas, home improvement tips, and delicious home cooking — all in one cozy place at VA Home Buzz!

Add Element

© 2025 CompanyName All Rights Reserved. Address . Contact Us . Terms of Service . Privacy Policy

Terms of Service

Privacy Policy

Core Modal Title

Sorry, no results found

You Might Find These Articles Interesting

T
Please Check Your Email
We Will Be Following Up Shortly
*
*
*