Add Row
Add Element
cropper
update
VIRGINA REAL ESTATE NEWS | VA HOME BUZZ
update
Add Element
  • Home
  • Categories
    • DIY
    • REAL ESTATE
    • HOME DESIGN
    • RECIPES
    • Home Improvement
    • Maintenance & Repairs
    • Extra News
    • Remodel On A Budget
April 13.2025
3 Minutes Read

Power Wash Like a Pro: A Beginner's Guide to Using a Pressure Washer

Using a pressure washer to clean a concrete path with boots visible.

Unlocking the Power of Your Pressure Washer

Using a pressure washer can transform your home's exterior, making it sparkle and shine with minimal effort. As a beginner, the prospect of wielding a powerful tool for the first time might seem intimidating, but fear not! This guide will help you harness the cleaning might of your pressure washer and elevate your DIY skills.

Setting Up for Success: Safety First

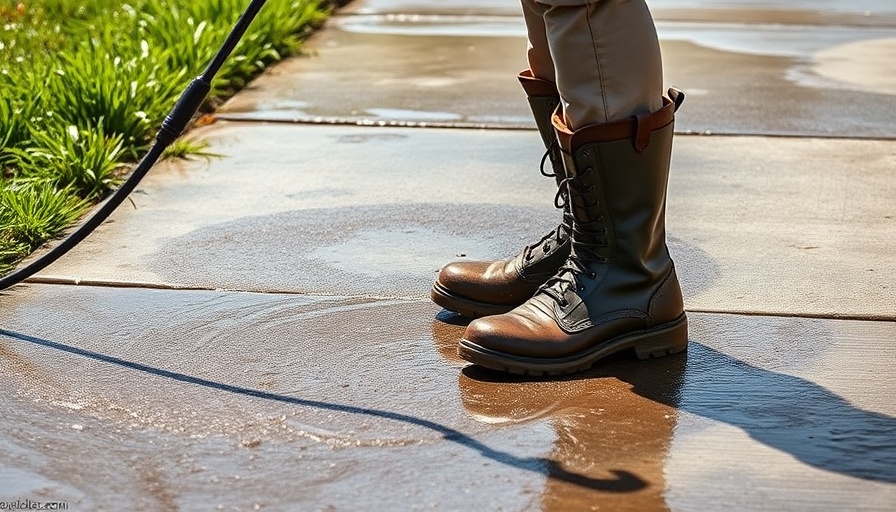
Before diving into your cleaning project, it’s essential to understand how to safely set up your pressure washer. Safety goggles, gloves, and closed-toe shoes are must-haves to protect against splashing and flying debris. Start by checking the area you’ll be cleaning—removing any obstacles and ensuring pets and children are at a safe distance. It's wise to work on a dry day, as wet surfaces can lead to slips and accidents.

Nozzle Know-How: Choosing the Right Attachment

Pressure washers come with a variety of nozzles, each designed for specific tasks. The 0-degree nozzle is powerful and best for tough stains, while the 25-degree nozzle offers more general cleaning capabilities. An important tip is to begin with the widest angle and gradually work your way into tighter spots. This strategy not only minimizes the risk of damage but also saves time and effort.

Best Techniques for Cleaning Various Surfaces

Understanding the right techniques for different materials is vital for effective cleaning. For patios and sidewalks, using sweeping motions will help clear dirt without etching the surface. Wooden decks require a gentler approach—using a wider nozzle and keeping a safe distance to avoid damage. For siding, applying detergent first can loosen grime, making the rinsing process much easier.

What Your Pressure Washer Can Clean

From decks and driveways to garden furniture, the uses for your pressure washer are endless. Many homeowners find it invaluable for garden maintenance, especially after heavy storms. It’s also fantastic for renewing outdoor furniture's original colors. However, it’s crucial to note that not all items can withstand that powerful stream. Avoid using it on delicate surfaces like painted or varnished items without testing a small area first.

Real-Life Transformations: A Home Improvement Adventure

Every homeowner has their favorite cleaning stories. Many shared how their pressure washer turned a dull, dirty patio into a welcoming outdoor space perfect for parties. One reader recounted how they tackled a year’s worth of grime from their driveway, feeling accomplished and relieved by the instant results. Such recreational cleaning moments encourage others to look at pressure washing as a fun weekend project rather than a chore.

Risks and Challenges of Pressure Washing

While pressure washing is generally safe, it comes with its own set of risks. Over-pressurizing can lead to damage—not only to your home’s surfaces but also to the machine itself. Constantly practice caution, and service your equipment regularly to maintain its best performance. Knowledge of your machine and technique can save you from costly repairs.

Before You Blast Away: Essential Preparation Steps

Lastly, let’s review the preparation steps before turning on the machine. Always fill the detergent tank if necessary, and check that your hose is correctly attached and free of leaks. Test the spray on a hidden area to familiarize yourself with the power level. These meticulous preparations will enhance your cleaning experience and ensure optimal results!

In conclusion, mastering your pressure washer opens up a world of cleaning possibilities while simplifying your outdoor maintenance tasks. So, gather your protective gear, get your favourite tunes ready, and dive into the satisfying world of pressure washing—your home will thank you!

Ready to take your outdoor cleaning to the next level? Discover the best pressure washer options and techniques today to enhance your home maintenance skills!

DIY

0 Comments

Write A Comment

*
*
Related Posts All Posts
10.31.2025

Discover the Nancy Meyers Aesthetic: Timeless Cozy Interiors Explained

Update Unveiling the Nancy Meyers Aesthetic: A Cozy Fantasy If you’ve ever found yourself swooning over the charming interiors in a Nancy Meyers film, you’re not alone. From the pastoral beauty of Something’s Gotta Give to the inviting warmth of The Holiday, the homes in her movies evoke a sense of nostalgia and comfort, making us all dream of our own perfect spaces. But what exactly makes the Nancy Meyers aesthetic so appealing? Understanding the Essence of Cozy Interiors At the heart of the Nancy Meyers aesthetic is a unique blend of elegance and functionality that gives her interiors a familiar, lived-in feel. Imagine walking into a room filled with natural light, soft colors, and supple textures that invite you to sit down and stay awhile. Each space is designed not just to look beautiful but to feel nurturing and alive. Key Features of a Nancy Meyers Home So, how can you replicate this enchanting aesthetic in your own home? Here are some essential elements to consider: Soft Color Palette: Stick to creamy whites, subtle beiges, and natural tones that soothe and calm the senses. Layering Textures: Emphasize comfort with a variety of materials like linen, cotton, and wool in your furnishings and accessories. Natural Light: Focus on maximizing daylight through large windows and soft window treatments that foster an airy feel. Inviting Spaces: Create cozy corners with oversized sofas, easy chairs, and plenty of pillows and throws for warmth. Think about how these areas inspire connection and relaxation. Soft Lighting: Equip rooms with warm light fixtures and plenty of candles for that extra touch of intimacy during evenings. The Heart of the Home: Kitchens and Dining Areas In Nancy Meyers films, the kitchen often plays the lead role. Take, for instance, the stunning space in It’s Complicated, where marbled countertops meet wooden cabinets adorned with copper cookware. Here are ways to infuse that same spirit into your kitchen: Consider elements like farmhouse sinks and pendant lighting to enhance the casual elegance. Incorporate open shelving to display beautiful dishware and create visual interest. Curate a dining area that encourages gatherings, featuring soft table linens and fresh flowers as centerpieces. Living Rooms That Invite Relaxation The living rooms in Meyers' films are iconic representations of comfort. Envision a space with slipcovered sofas in soft hues, big chairs perfect for curling up with a good book, and a myriad of textured cushions. To channel that vibe: Invest in slipcovered furniture, allowing you to maintain a fresh look with ease and comfort. Add layers with various throw pillows and soft blankets. Incorporate coffee tables displaying stacks of books and fresh flowers—traits evident in her films. A Bedroom Retreat: Your Personal Sanctuary A bedroom within the Nancy Meyers aesthetic is all about softness and serenity. Take inspiration from Kate Winslet’s romantic Californian escape in The Holiday. To create a sanctuary: Opt for warm linens and introduce layers with quilts and decorative pillows. Ensure bedside lamps provide warm, gentle lighting. Add personal touches, including photographs or a small collection of your favorite books. Practical Tips for an Inviting Space It's important to remember that you don't need to overhaul your home to achieve this look. Start small by incorporating elements that bring about coziness. Add fresh flowers to dining tables, or keep a stack of books nearby your reading chair. Don’t forget to light a few candles in the evening to enhance that inviting ambiance. Conclusion: Craft Your Own Cozy Narrative Channeling the warmth and inviting appeal of Nancy Meyers’ interiors can bring joy and comfort into your space. Allow yourself the freedom to experiment and bring your personal touch into the aesthetics of these storied homes. Remember, at the core of the Nancy Meyers aesthetic is the feeling of home—designed to be lived in and loved. What can you do today to start creating your cozy haven? Go ahead and add that one special piece or layer in those timeless elements. Your future self will thank you!

10.27.2025

How to Replace Your Garbage Disposal: A Quick DIY Guide

Update Replacing Your Garbage Disposal: A DIY Adventure Have you ever experienced the dread of discovering water pooling beneath your kitchen sink? It's the kind of surprise that no homeowner wishes to face. Recently, I received such a message that a puddle was forming under my sink, and upon investigation, I realized it was my old garbage disposal to blame. With my unit over 13 years old and clearly on its last legs, I decided it was time for an upgrade. Why You Might Need a New Garbage Disposal Garbage disposals typically last about 10 to 15 years, after which signs of wear and tear often begin to show. Strange noises, persistent clogs, or leaks are all red flags that your unit is nearing the end. If your disposal has been nightly humming, suddenly erupting into grinding, or has begun leaking, it may be time to consider a replacement. Instead of waiting for a plumber's hefty bill (think $320 for parts and labor, as I experienced), why not tackle this project yourself? Step-by-Step Process to Replace a Garbage Disposal If you're feeling overwhelmed at the prospect of this DIY task, fear not! I broke down the process into easy, manageable steps. Here’s how I replaced my disposal in under an hour. Gather Your Materials Before diving into the project, make sure you have everything you need: New garbage disposal (ensure it matches your old one in horsepower) Bucket Towels Wire cutters Screwdrivers (flathead & Phillips) Wrenchette (should come with the new unit) Adjustable pliers Power Down for Safety The very first step is crucial: turn off the power to the garbage disposal at the circuit breaker. Even if you have a wall switch, this is a vital safety measure to prevent any electrical surprises during the installation process. Disconnect the Old Unit Once the power is off, it's time to disconnect the old unit. Begin by loosening the mounting screws on the drain trap and disconnecting it from the disposal. Prepare for a little water and food waste to spill out—this is entirely normal! Keep your towels handy for this part. Remove and Replace Now it’s time to say goodbye to your weary disposal. Use the wrenchette to unlock it from the mounting assembly, which may take a little muscle. After this, you'll need to disconnect the electrical connections which involve removing the electrical cover plate. Save the screws and electrical clamp connector; you'll need them for the new unit. Wiring and Mounting the New Disposal Next, wire the new disposal according to the manufacturer's instructions. It’s all about matching colors: black to red, white to white, and grounding the green wire. After ensuring everything is secure, mount the new disposal to the mounting ring, which may require a bit of finesse if you’re working solo. Finalize with a Test Run After attaching the discharge tube to the waste drain and restoring power, it's time for the moment of truth. Run water through the sink and switch on your new disposal. If all goes well, you'll hear a quiet, reassuring hum instead of the unpleasant grinding of its predecessor! Common Concerns and FAQs As with any home repair, concerns may arise. If your new garbage disposal is leaking, the seals might not be secure; in this case, re-check your connections. Remember also to use plumber's putty on the sink flange to create a solid watertight seal, preventing leaks that can lead to bigger problems down the road. The Satisfaction of DIY Successfully replacing a garbage disposal not only saves you money but also gives you a satisfying sense of accomplishment. As I texted my friend to share the news, I felt empowered, knowing I had tackled this project on my own. If you're considering making this change, go for it! With the right tools and confidence, you, too, can transform your kitchen waste management with ease. Take Action Now! This project not only provides you with a working garbage disposal, but mastering home repairs builds confidence in your DIY skills. Why not invite a friend or family member to join you on your next home improvement expedition? The journey is even more rewarding with company!

10.23.2025

Choosing the Perfect Area Rug Size: Secrets to Elevate Your Home

Update Why Area Rug Size Matters More Than You Think When it comes to home décor, the size of your area rug can transform your space in ways you might not expect. Choosing the right size isn’t just about aesthetics, it’s about functionality and comfort. An area rug serves as a vital anchor in any room. It defines the seating arrangement, frames your furniture, and influences how large or cozy a space feels. A rug that is too small can create feelings of disconnection, while one that is too large can overwhelm the space. Thus, understanding the importance of rug size is critical for any homeowner looking to optimize their space in style. Standard Rug Sizes: A Quick Reference Guide The market offers a wide array of rug sizes, but familiarizing oneself with standard dimensions can tremendously simplify the selection process. Here are some common sizes: 5 x 8 feet: Often suitable for compact bedrooms, under coffee tables, or in entryways. 8 x 10 feet: The most versatile size, frequently used in medium-sized living rooms and bedrooms. 9 x 12 feet: Great for larger settings where you want most furniture to sit comfortably on the rug. Runners: Typically 2 x 8 or 2 x 10 feet, ideal for hallways or narrow spaces. As you explore options, keep in mind your preferences and how the rug's dimensions correspond to your specific rooms. Tailoring Rug Size to Your Living Room Layout At the heart of any stylish living room is a carefully selected area rug. Here are different configurations to consider: All Furniture on the Rug: For spacious living areas, choosing a larger rug (9 x 12 feet or more) that accommodates all seating creates a luxurious, cohesive look. Front Legs Only: This is a practical choice that still looks polished. A rug that fits under the front legs of your sofas and chairs (typically around 8 x 10 feet) offers a balance between coverage and cost. Floating Rug: In open floor plans, using a larger rug can create a clear definition of spaces, making the furniture arrangement feel more intentional. Each layout not only impacts the visual flow of the room but also how inviting it feels to potential guests. Bedroom Rug Essentials: Where Comfort Meets Design Bedroom rugs play a critical role in achieving comfort and cohesion. Depending on the size of your bed and room, here are key guidelines: Rug Under Entire Bed: For maximum softness, opt for a 9 x 12 rug that fully fits under a queen or king-sized bed, providing plush flooring when you step out of bed. Two-Thirds Under the Bed: A slightly smaller rug (like 8 x 10 feet) covering two-thirds of the bed is a good compromise, allowing for a soft landing at the foot and sides while preserving some floor space. Runners Beside the Bed: For smaller rooms or tighter budgets, pairs of runners on either side of the bed can add comfort where it matters most. In addition, consider alternate shapes such as round or square rugs that might fit better with your room's layout. Common Area Rug Sizing Errors to Avoid It's easy to make a mistake when choosing an area rug size, especially if you’re not aware of what to look out for. Some common pitfalls include: Buying Too Small: This is one of the most frequent errors. Rugs that don’t touch furniture legs can leave your room feeling scattered. Ignoring Room Proportions: A rug that fits in one direction but neglects the other can create an awkward atmosphere. Forgetting About Clearance: Ensure your rug doesn’t obstruct doors, particularly in bedrooms. Omitting a Rug Pad: A good rug pad not only prevents slipping but also enhances comfort and extends the rug’s life. These tips can help ensure your choice enhances the overall feel and function of your space. The Bottom Line: Sizing the Perfect Rug Ultimately, selecting the right area rug is essential—not only for aesthetic appeal but also for lifestyle comfort. By understanding standard sizes and examining the layout of your space, you can make an educated choice. Consider trying out different sizes with tape or paper layouts to virtually visualize the best fit. Remember, your rug should not just occupy space but elevate your home, reflecting your taste and enhancing your comfort. Finding that perfect rug can be a journey, but once you do, it can completely redefine your room. So, measure twice and choose wisely!

Terms of Service

Privacy Policy

Core Modal Title

Sorry, no results found

You Might Find These Articles Interesting

T
Please Check Your Email
We Will Be Following Up Shortly
*
*
*