Add Row
Add Element
cropper
update
VIRGINA REAL ESTATE NEWS | VA HOME BUZZ
update
Add Element
  • Home
  • Categories
    • DIY
    • REAL ESTATE
    • HOME DESIGN
    • RECIPES
    • Home Improvement
    • Maintenance & Repairs
    • Extra News
    • Remodel On A Budget
July 16.2025
3 Minutes Read

How to Hide Your Attic Door with a Tongue and Groove Ceiling

Seamless hallway with hidden attic door in ceiling, showcasing how to hide attic door in ceiling.

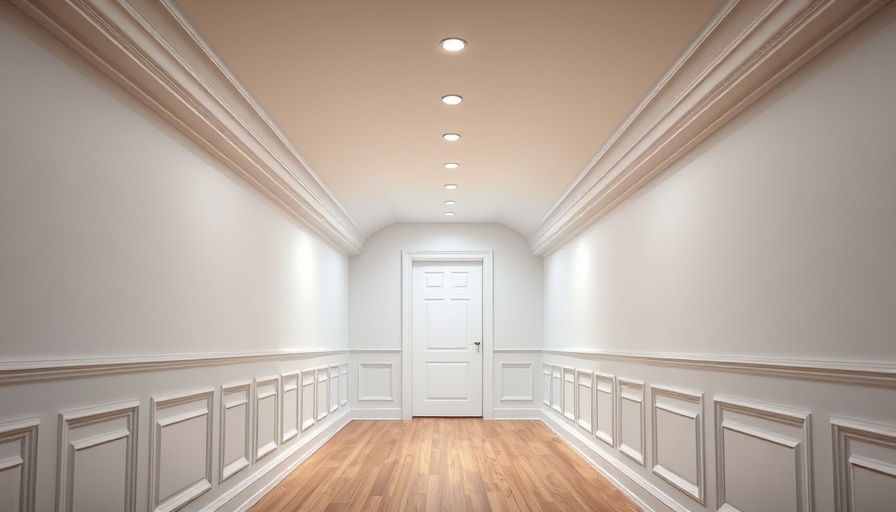
Transforming Your Home: The Magic of Hiding Attic Doors

For many homeowners, hidden projects like concealing an attic door can become a source of frustration over time. It's one of those things that you notice but can never seem to find the motivation to tackle—until inspiration strikes! Recent home improvement trends are showcasing innovative ways to enhance functionality while crafting an aesthetically pleasing space. One effective method is using tongue and groove planks, which not only solve design dilemmas but elevate the entire atmosphere of a room.

Step-by-Step Guide to Concealing Your Attic Door

With a little bit of planning, you can take your hallway from cluttered to charming. Here’s a simple step-by-step process to hide your attic door using tongue and groove ceiling boards:

1. Gather Your Tools and Materials

Begin by collecting the necessary tools, which include tongue and groove planks (like the recommended 5 1/4" wide pre-primed pine shiplap boards), a miter saw, construction adhesive, 2-inch 16-gauge finish nails, caulk, wood filler, and paint for finishing. Having everything ready ensures a smooth project flow.

2. Clear and Prepare the Area

Firstly, remove any existing trim, molding, and the attic door itself to create a clean workspace. This makes your new project easier to install and results in a more polished final look.

3. Measure and Plan Smartly

Before you start cutting, take the time to measure your ceiling accurately. Sketch a mock-up layout using scrap pieces to visualize how the planks will fit together. This initial step helps in avoiding awkward gaps along the edges.

4. Installation: Begin with the First Plank

Apply construction adhesive to the back of your first plank, starting at the edge of the attic door for a symmetrical look. Secure it in place with nails and continue patterning this way throughout the rest of the ceiling.

5. Smart Cuts for a Seamless Finish

As you progress, cut each subsequent plank at a 45° angle where it meets the attic door. This eliminates visible seams and enhances the overall aesthetic appeal. Continue adhering these planks in the same manner until you have completely covered the desired area.

Why This Project Matters

This simple yet transformative project not only reduces visual clutter but also enhances the value of your home. In the world of home design, the “cottage-core” aesthetic is gaining popularity, and incorporating tongue and groove ceilings can easily provide that cozy, welcoming charm.

Inspiration from Homeowners

Consider sharing your journey with friends and family. Document the process and invite them to join you; this fosters a sense of community while also inspiring others to take on their home improvement projects. Personal stories often drive enthusiasm—like the time one local couple recovered an oft-neglected attic space by transforming it into a delightful reading nook.

Your Turn to Shine!

Are you ready to transform your home? With just a few supplies and some creative energy, you can tackle this project and more. So roll up your sleeves and take the plunge into DIY. Not only will it bring you joy to see the fruits of your labor, but you’ll also create a beautiful space that reflects your personality.

Take action! Dive into your project today, and watch how transforming just one area can elevate the entire character of your home.

Home Improvement

0 Comments

Write A Comment

*
*
Related Posts All Posts
10.27.2025

How Do New Windows and Doors Boost Your Home's Value in the UK?

Update Unlocking Home Value: The Impact of New Windows and Doors For homeowners and potential buyers in the UK, upgrading to new windows and doors can be more than an aesthetic choice; it can be a smart financial investment. In a world where energy efficiency and safety are paramount, property features such as modern windows and doors can significantly enhance a home’s market value. According to the latest research, newly installed double-glazed windows can add between 5% and 10% to a home’s value — translating to a potential increase of £15,000 to £30,000 for an average property priced at £300,000! How Do Quality Upgrades Reshape Home Appeal? As energy costs continue to rise, homeowners are now scrutinizing the thermal performance of their property. With the introduction of advanced glass technologies — particularly laminated double glazing — not only are homes becoming more energy-efficient, but they are also seeing notable enhancements in security and aesthetics. Laminated glass is especially attractive due to its impressive durability; even when cracked, the panes remain intact, adding a critical layer of protection. In addition to safety, new windows transform the exterior appearance of a home. A fresh look can create an inviting atmosphere that entices potential buyers even before they step inside. By investing in energy-efficient features, buyers are able to envision both savings on energy bills and a more comfortable living environment. Laminated Glazing: The Superior Choice Laminated double glazing is quickly becoming the preferred option among discerning homeowners. Unlike traditional triple-glazed windows, laminated options provide comparable or superior thermal performance without the heft and installation difficulties. With a U-value as low as 1.0 W/m²K, these windows not only prevent heat loss but also reduce noise pollution significantly — offering up to a 35dB reduction with acoustic laminate technology. Furthermore, the ongoing environmental concerns have made sustainability a priority; laminated windows crafted with recycled materials, such as EcoMax Low-E glass, contribute positively to carbon footprints. Decisions That Matter: Choosing Wisely Replacing old doors and windows is often emphasized in property maintenance. A neglected entrance can be an instant deterrent for prospective buyers, so it’s crucial to consider the specification of new installations. With the right choices, homeowners are not only improving their property’s value but also enhancing comfort and functionality. For many, the window investment is tied to broader home improvement plans. Ideally, homeowners should take the opportunity to review their options, compare quotes, and understand their potential savings before committing to major upgrades. Ultimately, investing in high-quality windows and doors is a proactive step towards not just elevating property value but also ensuring energy efficiency and comfort. This holistic approach to home improvement can lead to long-term benefits that far exceed the initial expense.

10.01.2025

Energy Bills Rise 2%: Tips for Homeowners to Manage Costs

Update Understanding the Latest Energy Bill IncreaseAs energy bills across the UK rise by 2% from 1 October, homeowners are left grappling with what this means for their budgets. With Ofgem announcing a new cap of approximately £1,755 annually for the average dual-fuel household, this increment—around £35 a year—may seem minor, but it can accumulate quickly, especially combined with existing standing charges. It’s time to decode this change and explore immediate actions you can consider.Standing Charges: Why They MatterStanding charges can often feel like the slippery slope of our energy bills, especially for low users where these fixed costs constitute a significant proportion of the total bill. Understanding this dynamic is essential. While unit rates fluctuate based on energy consumption, the fixed daily fee can catch many unaware. Hence, cutting down on energy waste through energy-efficient home improvements can be crucial.Your Action Plan: Strategies to Mitigate Increased CostsNow that you know the reasons behind the billing increase, let's explore strategic home improvements that can help counteract these costs:Insulation: Enhancing your home's insulation can dramatically lower heating costs. Consider insulated windows, doors, and even roofs to reduce heat loss, particularly in colder months.Draught-Proofing: Applying simple draught-proofing solutions around windows and doors is a swift and budget-friendly way to enhance comfort and energy efficiency.Smart Thermostats: Installing a smart thermostat allows meticulous control over heating schedules, preventing unnecessary energy consumption.Long-Term Expectations: The Future of Energy PricesWhile some forecasts hint at a potential dip in energy prices in early 2026, it’s wise to stay cautious. The factors influencing energy costs are multifaceted, and awareness can empower homeowners to adapt financially to impending changes. With foresight, combined with actionable steps today, you can manage your energy usage effectively.Take Charge of Your Home’s Energy Efficiency TodayThe rise in energy bills is indeed a call to action. By reevaluating your home's energy efficiency now with potential improvements, you can not only prepare for upcoming adjustments in your bills but also significantly enhance your living environment. Whether through insulation upgrades or simply being more mindful of energy consumption, empowered homeowners can find solace in the midst of rising costs.

09.30.2025

Why Beadboard is the Smart Choice Over Drywall for Your Home

Update Why Choose Beadboard Over Drywall? When starting a remodeling project, the choice between drywall and alternative materials is crucial. As many homeowners can attest, drywall often feels like the go-to solution, but for those looking to add both charm and efficiency, beadboard emerges as a surprising contender. This is especially true for tight spaces like a laundry room, where losing even a few inches can hinder cabinet layouts. Beadboard not only maximizes space; it also delivers a vintage aesthetic that can transform an ordinary area into something extraordinary. Time-Saving Installation Speed is the name of the game in home renovations, especially during chaotic remodels. Beadboard's installation process is notably quicker than drywall. Instead of navigating through mudding, taping, and sanding, homeowners can embrace the simplicity of adhesive and finishing nails, making the transformation happen with minimal fuss. According to DIY enthusiasts, including those featured in Blesserhouse, the fast-paced installation is a major reason why they opted for beadboard, with results that boost both style and usability. The Aesthetic Appeal of Beadboard The visual impact of beadboard should not be underestimated. This classic design element introduces a texture and character to a room that is often lost with standard drywall finishes. For homeowners seeking to create a cozy and inviting atmosphere, beadboard delivers with its vintage charm and variety of styles—from traditional to modern interpretations. Angela Marie’s tutorial demonstrates this well, showcasing how beadboard brings character and quality to both small and large spaces, making it suitable for bathrooms, living areas, or even accent walls in offices. Cost-Effectiveness of Beadboard Another compelling reason to choose beadboard is its affordability. Compared to drywall, which can accumulate hidden costs through the necessary finishing work, beadboard offers a cost-effective alternative. Vinyl beadboard, in particular, stands out as an economical choice, providing durability with low maintenance and aesthetic versatility. As highlighted by Decorative Ceiling Tiles, the long-term savings come not only from the reduced installation costs but also from its energy efficiency and minimal upkeep, appealing to budget-conscious homeowners looking to improve their living spaces. DIY Tips for Beadboard Installation Installing beadboard can be an engaging DIY project for homeowners. Here are some essential tips that can guide you through the process: Measure Twice: Accurate measurements are vital. Ensure that you measure your walls precisely to avoid costly mistakes. Use Adhesive: While nails alone can suffice, using construction adhesive provides extra security, particularly on walls without ample stud coverage. Finish with Style: After installation, caulking seams and painting can elevate the final look, giving it a polished finish. Choose a shade that complements your existing decor. By employing these tips, you too can achieve a stunning beadboard finish that reflects both your personality and style. Conclusion: Embrace Beadboard for Your Next Project In a world bursting with choices, beadboard stands out as a versatile and charming option that meets both functional and stylistic needs. It is a smart choice for anyone looking to enhance their home without a significant investment of time or resources. As Emily Brooks suggests, taking the leap to embrace beadboard might just be one of the best decisions you make for your renovation dreams. So why not try it? Get started on making your space feel like home today!

Terms of Service

Privacy Policy

Core Modal Title

Sorry, no results found

You Might Find These Articles Interesting

T
Please Check Your Email
We Will Be Following Up Shortly
*
*
*